This whole project took me about 3 hours. It would have taken much less time if I had simply used one fabric like the original tutorial did. But...I didn't have enough fabric to use for two windows...and I'd rather spend an extra 2 hours making what I already have work instead of getting my lazy ass to the fabric store. So..
Here's what I started out with:
I've been meaning to replace these blinds since I moved in with my boyfriend. If they're not enough of an eye sore like this, they look twice as bad when drawn up.
This is inexcusable.
I was about to finally throw them out today- suck it up and buy a new set at Target when I got the idea to check Pinterest to see what those fools had done with busted up blinds. Of course, I was not disappointed. The best part about this project? I already had everything I needed in my house! (Of course, I have half of a craft store in my spare bedroom, so your results may vary). I started out with fabric that I had bought awhile back, planning on doing something with it.
My Supervisor, checking out the situation
Obviously, I ironed the fabric. What I quickly realized was that I wouldn't have enough to do both windows if I simply left it intact. I didn't feel like leaving the house, so I needed an out of the box solution. So I decided to cut it up and mat it on brown fabric, which I have a metric shitton of.
This isn't working.
The cat thought it was super fun to run and slide into the fabric. Repeatedly. So he had to get the boot.
He didn't appreciate this.
After debating what was worse- fucked up fabric or incessant meowing, he won.
He looks so smug.
So the window is approximately 50 inches, so I left a few extra inches so I could fold over and ghetto hem it (aka: hot glue) I cut the stripped fabric so that I had 6 pieces, 3 sets (one set for each window). Then I hot glued the stripped fabric to the brown fabric around the edges. I folded the brown fabric up over the bottom and top and glued it on top of the bottom line of the stripped fabric to form hems.
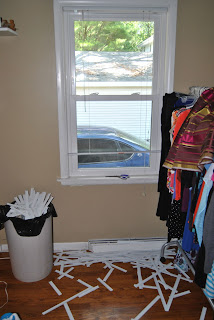
The blinds were obviously still on the window. So I cut them on it. I cut all plastic slats out except 10. I knew I wouldn't need 10, but I kept that many just in case. I also cut out the ladder rope that holds the slats in place, since they would no longer be necessary. I took extra caution to not cut the thicker rope that runs from the top to bottom, because this is the line that draws the blind up and down. Once you remove the ladder rope, all the blinds will fall to the bottom. That's ok.
Slightly messy
After I cut it all, I made sure the blinds were set to the length I wanted them to be. If it were fully extended it would have laid about 5 inches below the window sill, and I didn't want this. I knew this would cause the rope to be a bit slack but I figured it didn't really matter because the fabric was dark enough to cover it up. I took a look at my fabric and realized that the edges of the stripped fabric needed...something, otherwise it would constantly fray and generally look like shit. So I found some ribbon and hot glued that shit right on.now
Awesome!
Then I flipped this finished project over so that I could hot glue it to the blind frame. I didn't take any pictures of this because...I just didn't. I don't know. Here, go here
if you really need to see pictures of it.
I glued the top to the edge of the fabric, and according to the tutorial, I did it backwards. Too bad. It still works. It's just made for lefties now, I suppose. Since I have four thick pieces of ribbon, I used those as guides to glue the slats because I could feel them from the back. At this point I hung it back up on the window. So now it was basically done except for the sides needing to be hemmed and the bottom needed to be glued to the thick bottom section. I folded the sides over and hot glued the pieces to the other sides of the slats and also along the bottom. ALL DONE!
Full Length
Rolled up partly
And a little more.
TA DA.
Oh, I also created the little tie back using extra ribbon, flower embellishments and a little velcro. Good news- it's done! Bad news- there's still another window to do. But not today.


No comments:
Post a Comment